Whenever I teach PowerShell and we get to talking about the PowerShell ISE, I encourage people to get in the habits of using regions. A region can help you organize your code and hide it when you don't need the distraction. I think regions are especially helpful if you are creating a module file with multiple function definitions. For those of you who don't know what a region looks like, it is a set of comments which are case sensitive and need to be all lower case.
#region
#endregion
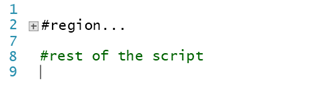
Whatever code you put in between will be collapsed.
 An expanded region (Image Credit: Jeff Hicks)/em>
A collapsed region (Image Credit: Jeff Hicks)
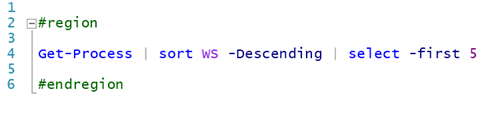
But, you can make your regions descriptive by adding text after the key word region.
 Adding a region description (Image Credit: Jeff Hicks)
When you collapse the region, you can still see the description. Because I like to use regions, I put together a simple function you can use in the PowerShell ISE to automate the process.
Function New-ISERegion {
[cmdletbinding()]
Param(
[Parameter(Position = 0,HelpMessage = "Enter text for the region")]
[string]$Text
)

$newRegion = @"

#region $Text


#endregion

"@

#insert into the current file

$psise.CurrentFile.Editor.InsertText($NewRegion)

} #end New-ISERegion

Set-Alias -Name nr -Value New-ISERegion
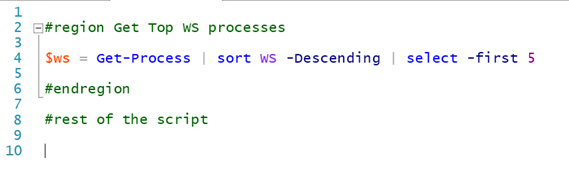
I also defined an alias to make it even easier. Once loaded in the ISE, assuming my cursor is in position for where I want to add the region I can type this command:

Creating a new region (Image Credit: Jeff Hicks)
And get this result:

The new region (Image Credit: Jeff Hicks)
Eventually I will roll this into my ISE ScriptingGeek project. But for now, you can add it to the ISE Add-Ons menu with code like this:
$action = {
Add-Type -AssemblyName "microsoft.visualbasic"
$mytext = [Microsoft.VisualBasic.Interaction]::InputBox("Enter a region description","New Region")
New-ISERegion $mytext
}

$psise.CurrentPowerShellTab.AddOnsMenu.Submenus.Add("Insert a region",$action,$null)
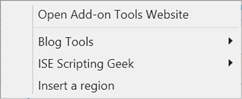
The new add-on (Image Credit: Jeff Hicks)
I added an extra bit of code so that you can get a GUI prompt so that when you click to insert a region:
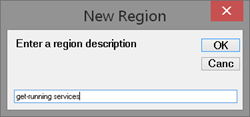
The description prompt (Image Credit: Jeff Hicks)
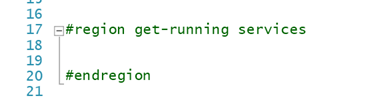
The new region (Image Credit: Jeff Hicks)
If you click Cancel or don't enter anything, you'll still get a region but without any description.
You could use this tool at the start of a new project by going through and outlining what you need to accomplish with regions. When finished, your code is organized and even partially documented.
Enjoy!